Bulk import from Zendesk
The bulk import moves a brand's Zendesk history in one run: tickets, conversations including internal notes, contacts, and attachments. This page walks through the run, then covers the pitfalls worth knowing before you start, especially if you're about to cancel your Zendesk subscription.
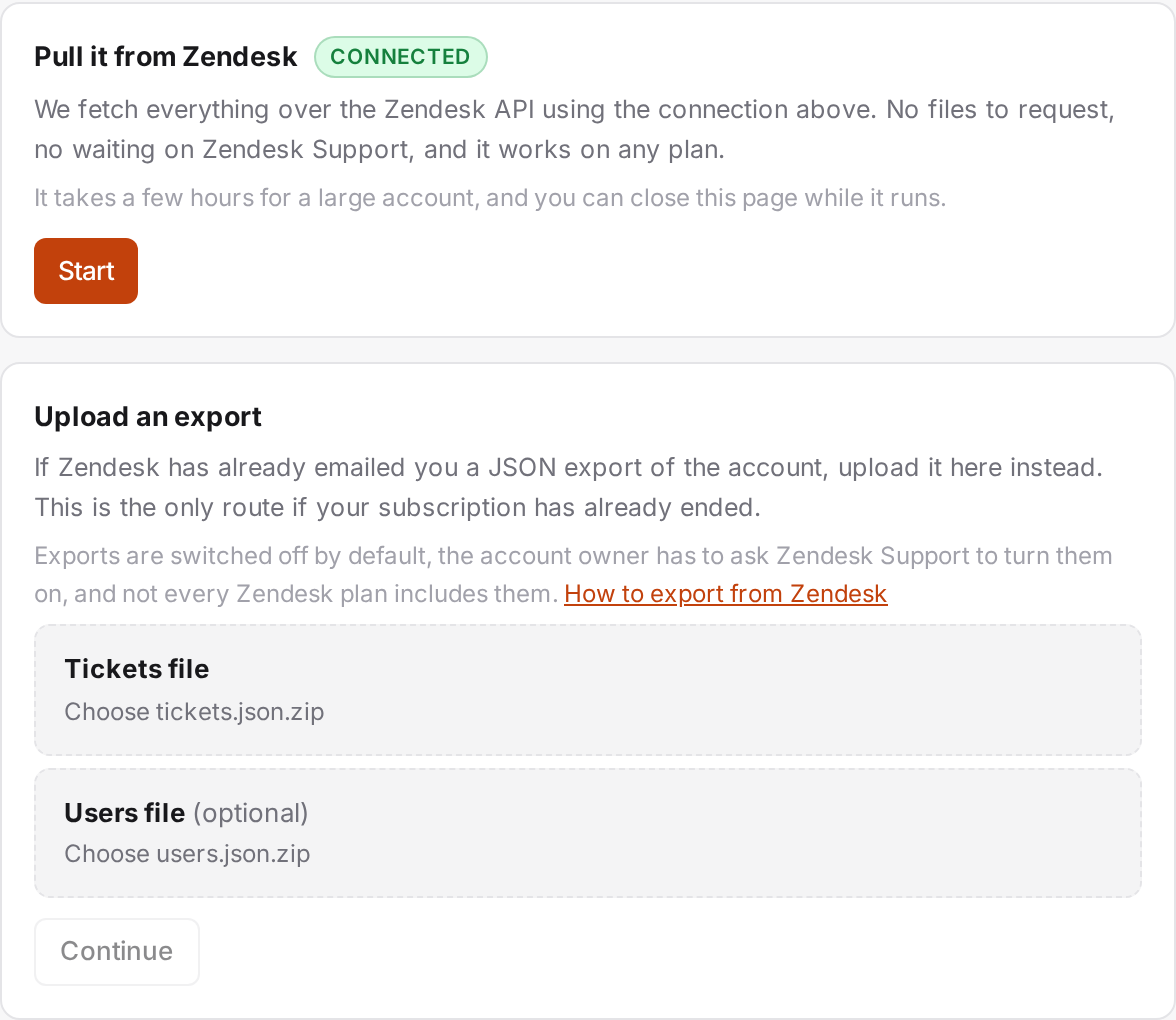
1. Choose your route
There are two ways to get your data in, and they end in the same import.
- Connect over the API. If your Zendesk is still live and you have admin access, this is the simpler route. No export files to request, and it works on any Zendesk plan.
- Upload export files. If you've already left Zendesk but downloaded your data exports before cancelling, upload those files and the import runs from them alone.
2. Upload route: the files
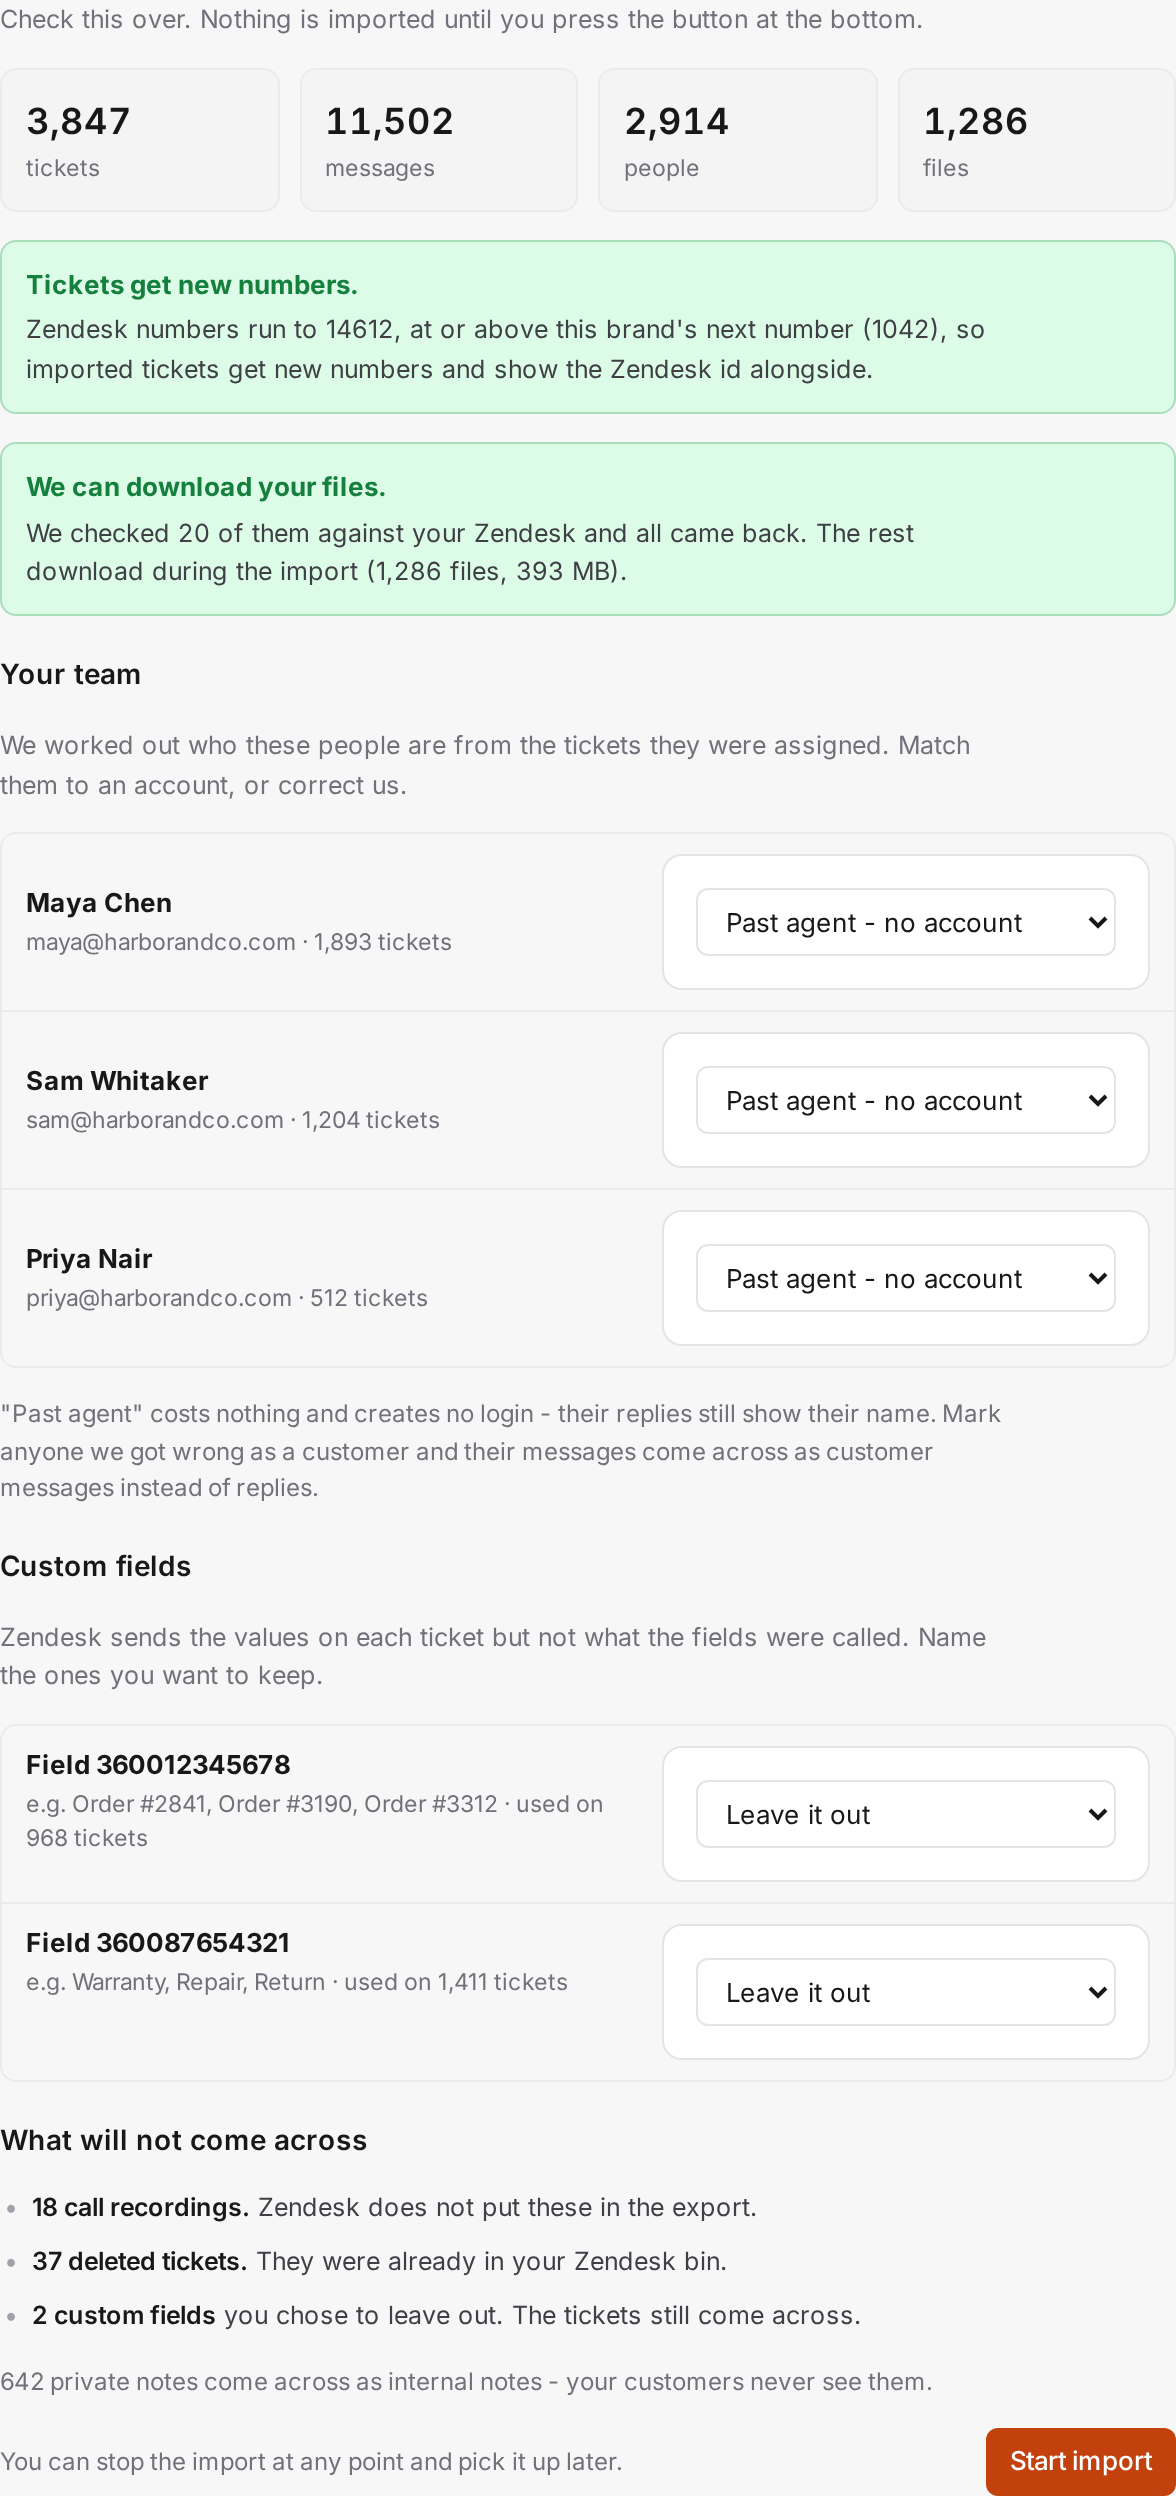
Zendesk's data export produces separate downloads for tickets and users, as JSON. You need both. Open the brand in AllMy Support, go to Integrations, and upload them where the import asks. The import validates the files and shows you a preview of what it found: how many tickets, conversations, and contacts, before anything is written.
3. API route: connect and pull
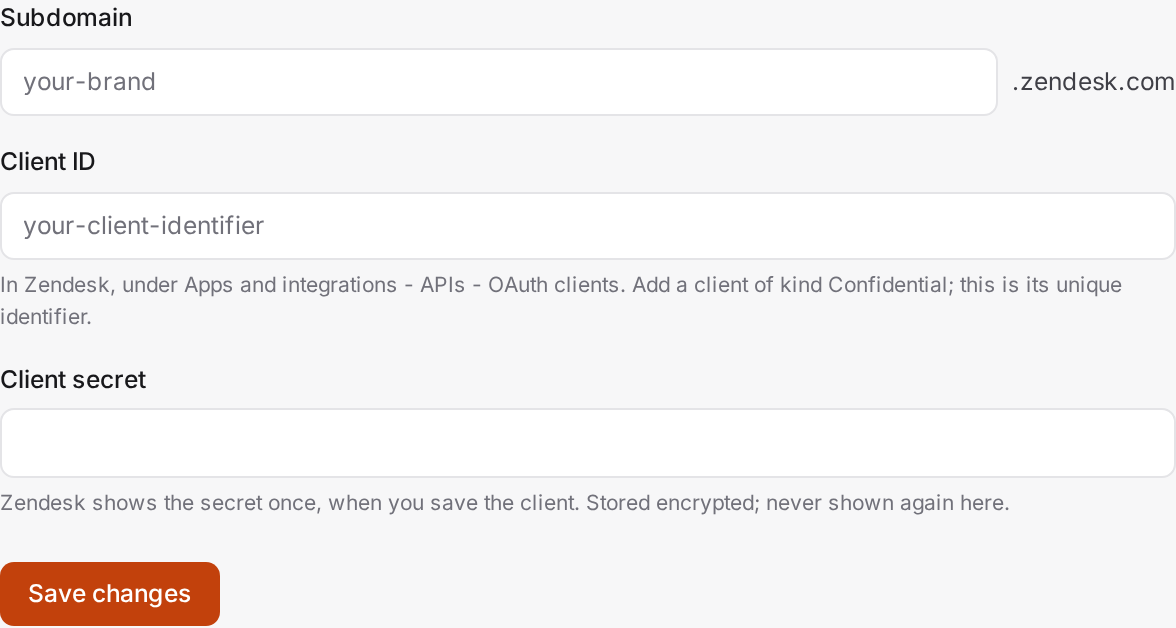
Connect your Zendesk account from the brand's Integrations page, then start the pull. AllMy Support fetches your tickets, users, and attachments over Zendesk's API and shows progress as it goes. A large account takes a while, sometimes hours. That's fine: you can stop a pull and resume it later without losing your place.
4. Map before it runs
Before the import writes anything, you confirm the mapping: which brand the history lands in, how Zendesk agents match up to your team, and what happens to custom fields. Agents are worked out from who handled the tickets, and you can correct any of them before the run. Tickets stay attributed to agents who have since left.
5. Run it
Start the run and watch the progress. The import doesn't trigger your automations and doesn't email your customers; history arrives quietly. When it finishes you get a report of what came across, including any attachments that couldn't be fetched.

6. If it's not right
You can undo an import run. The imported tickets are removed, you adjust the mapping or the files, and run it again. Contacts stay, since they may have live tickets of their own by then.
Pitfalls
- Exports are off by default. The Zendesk account owner has to ask Zendesk's support to enable data exports; it isn't self-serve. Allow up to a day for the export to be generated and emailed to you.
- Not every Zendesk plan includes exports. Check Zendesk's export documentation for what your plan allows. The API route has no such gate: it works on any plan.
- Export before you cancel. Once your Zendesk subscription lapses, there's no way back in to your data. If you're planning to leave, request and download the exports first, or run the API import while the account is still live.
- Voice call recordings don't come across. The rest of the conversation on those tickets does.
- Some attachments may not be retrievable from files alone. The report lists any the import couldn't fetch. Connecting the API lets the import collect the ones the files couldn't provide.
- Zendesk settings don't move. Macros, triggers, automations, and views are Zendesk configuration, not history. Rebuild what you need with saved replies and automations.
Help-center articles are a separate, smaller import: see Knowledge base. For what imports mean when customers sign in, see Import from Zendesk. Still deciding whether to move? Switching from Zendesk covers getting your data out in time, and the comparison page puts the two products side by side.